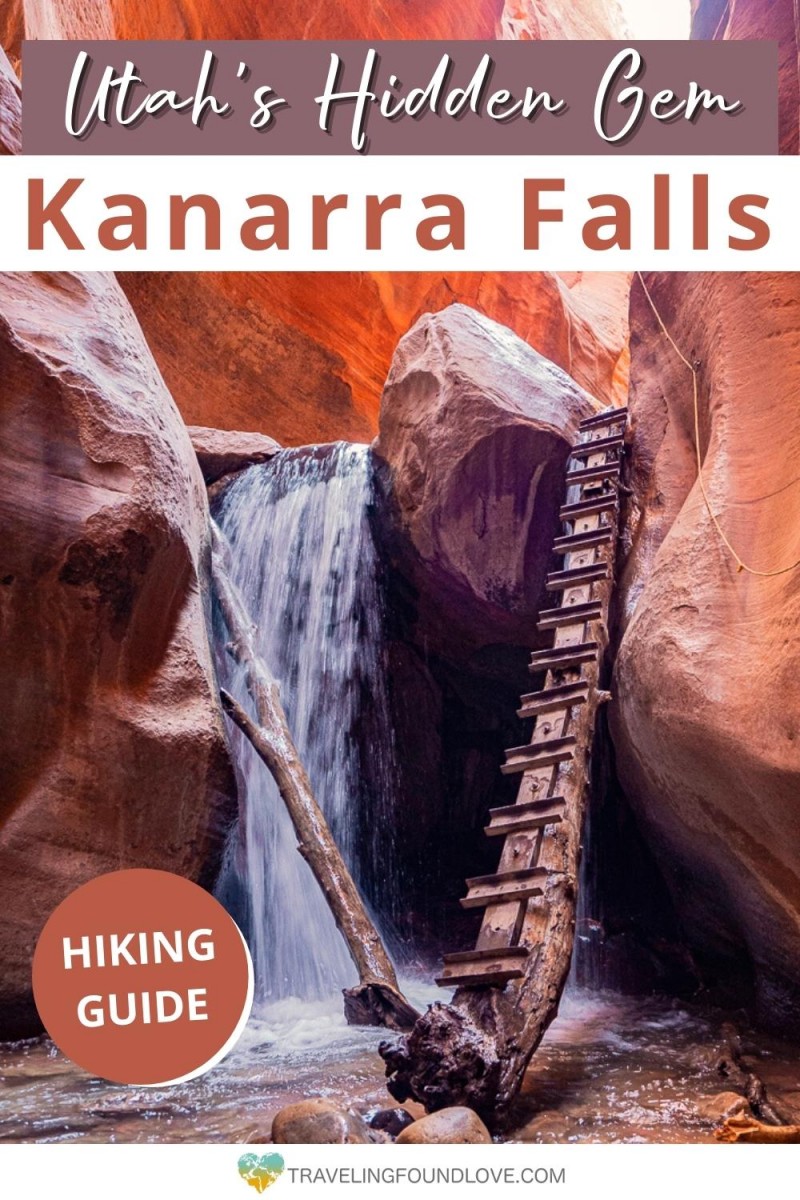
What to Expect on the Kanarra Falls Trail
Kanarra Falls is still kind of a hidden gem in Utah. With not just having one, but two waterfalls, this slot canyon is beyond the imagination.
After our adventures in Zion National Park, which included hiking the Zion Narrows, we couldn’t wait for our next slot canyon adventure. Due to its less popularity and the limited permits the town of Kanarraville Utah gives away for each day, you will find more solitude and can fully enjoy the gorgeous scenery on this trail.
Even though it is not considered a technical hike, there are some fun challenges waiting for you at the Kanarra Creek trail.
Keep reading to find out more about the obstacles on the Kanarra Creek trail, the best way to get a permit, needed hiking gear, and everything else you need to know.
We are sure you will be adding the Kanarra Falls hike to your Utah bucket list by the end of this post if you haven’t already.
Other Resources for Utah
- Best Hikes in Zion National Park
- Best Bryce Canyon Hikes for Your Bucket List
- Trails to Hike Arches National Park
- Explore 10 Striking Captiol Reef Hikes in the Fruita District
- The Best of Island in the Sky Canyonlands National Park
This post may contain affiliate links. If you make a purchase through them, we get a small commission at no extra cost to you. It helps us create free content for you to enjoy. Learn more about our disclaimer here. Thanks for your support!
About Kanarra Falls

Kanarra Falls is located in Kanarraville Utah, which is a small town just north of the Kolob Canyons section of Zion National Park. It is also referred to as Kanarraville Falls, Kanarra Creek Falls, and some other variations of the words.
This once hidden gem in Kanarraville Utah is now a popular hiking destination. The Kanarra Falls hike is similar to the nearby Zion Narrows in that they are both slot canyon hikes, however, Kanarraville Falls is much smaller in size and less crowded.
A hike to Kanarraville Falls Utah includes a slot canyon with river crossings, ladders and boulders to climb, 2 waterfalls, and beautiful scenery.
How to Get to the Kanarra Falls Trailhead
Kanarra Falls is located roughly 20 miles south of Cedar City in Kanarraville Utah. After exiting Highway 15, it is just 5 more miles (mainly on Old U.S. 91) to the trailhead. If you are following Google Maps, you should have no problem finding it.
Zion National Park, Utah – 58 minutes, 47 miles
Bryce Canyon National Park, Utah – 1 hour 45 minutes, 103 miles
Kanab, Utah – 1 hour 40 minutes, 91 miles
Las Vegas, Nevada – 2 hours 20 minutes, 159 miles
Please make sure you park in the designated parking lot only. There is plenty of space, so do not park in front of homes or driveways in the area.
How to Get a Permit for Kanarra Falls
To hike the Kanarraville Falls Utah trail you must obtain a permit. The trail is limited to 150 hikers PER DAY. Tickers sell out quickly, especially in the summer months.
In the rare event that the daily visitor limit is not reached, tickets will be for sale at the trailhead. But we would not count on this. If you want to make sure to be able to hike the trail on your desired date, purchase tickets 2-3 months in advance.
Top Tip: The tickets for the whole year go on sale in January.
A permit costs $12 per person. A child age 3 and under is free. The permit includes access to the hiking trail, all processing fees, and free parking at the Kanarra Falls hike trailhead parking lot.
After purchasing your ticket online, you will receive two emails. One is your confirmation, the other email has your tickets enclosed.
When you arrive at the trailhead, you will need to either show your printed ticket or the QR code on your phone.
Do keep in mind that your ticket is only valid on the date on which you purchased it. If the trail is closed due to inclement weather or other reasons, you will be allowed to use your ticket for a future date. There are NO refunds for tickets purchased.
Kanarra Falls Trail Statistics
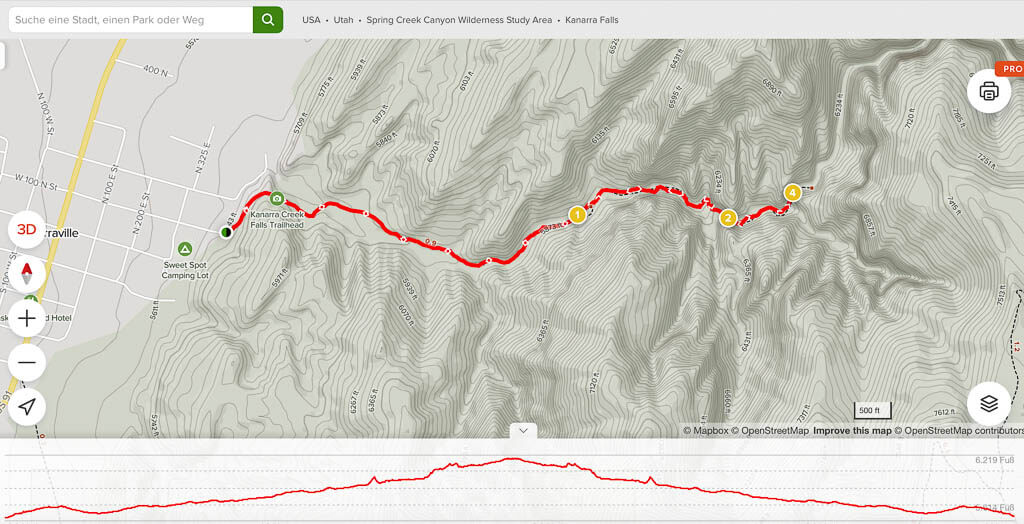
Difficulty: Moderate
Length: about 2 miles to hike to and back from Kanarra Falls and about 4 miles out and back to the second waterfall
Type of Hike: Out and Back
Elevation Change: around 700 ft
Trailhead: Just off the parking lot to Kanarraville Falls
Permit: Yes
Time: 3 – 4 hours
Kanarra Falls Trail Description
Once you have parked in the parking lot, head to the small kiosk to your left to present your permit. The trailhead for the Kanarra Creek slot canyon is just past the booth off to the left.
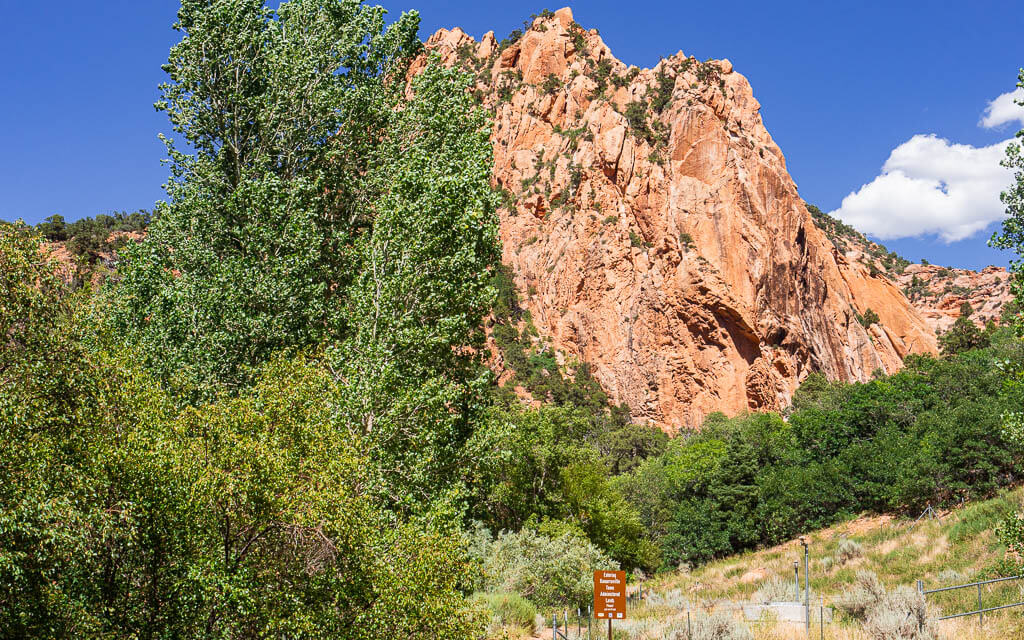
You will take a short incline up Hurricane Cliffs to begin your hike to Kanarra Creek Falls.
Top Tip: For the first part of the trail, you will be fully exposed to the sun. In the hotter months, it might be a good idea to start your hike earlier in the morning.
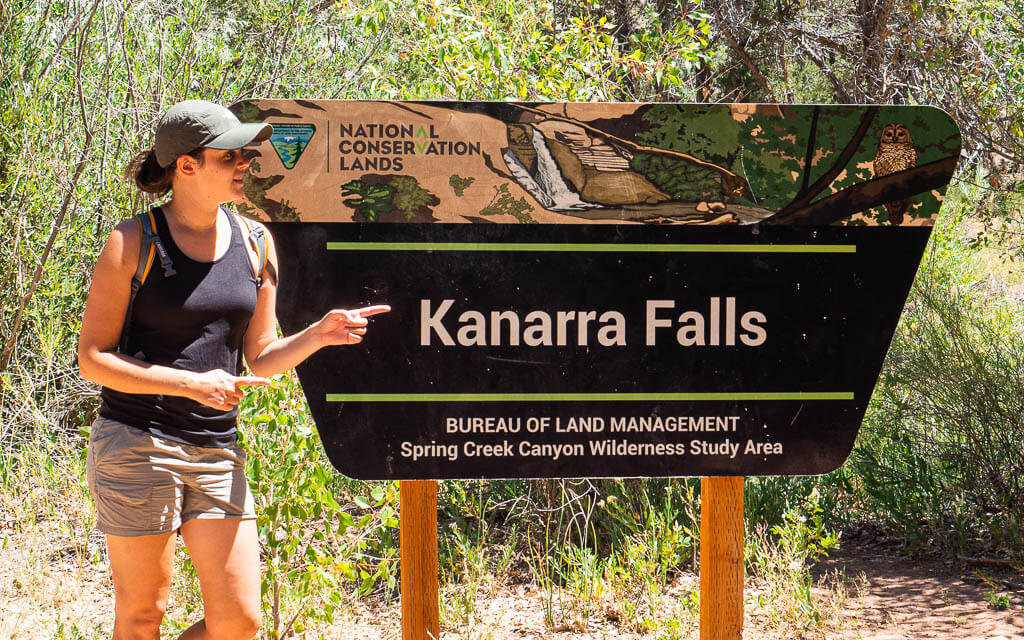
At about 0.8 miles you will reach a vault toilet and the official Kanarra Falls sign. Cross the little stream and continue on the path straight ahead of you.
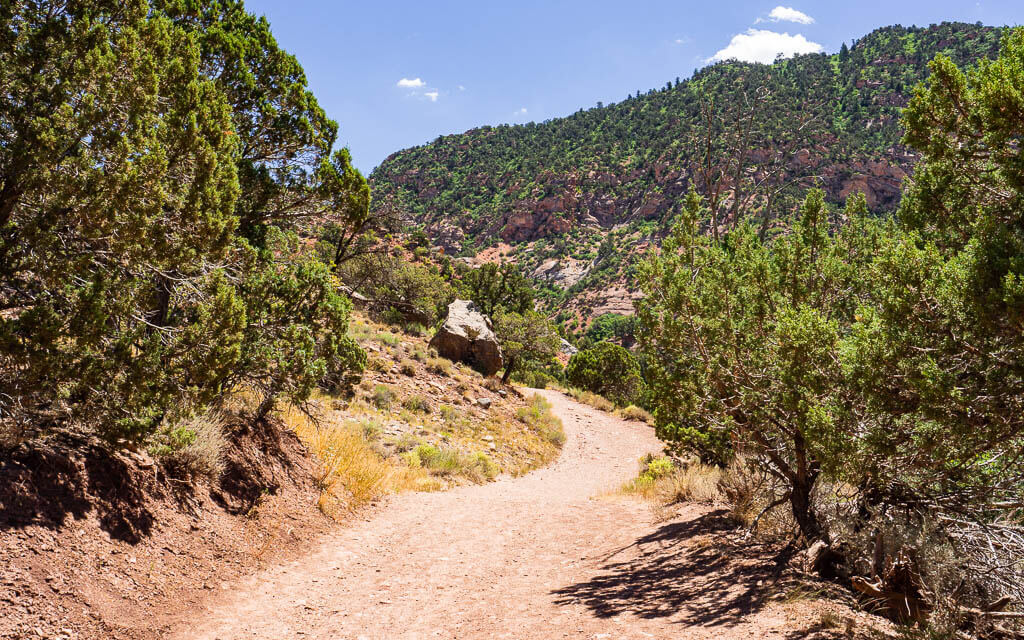
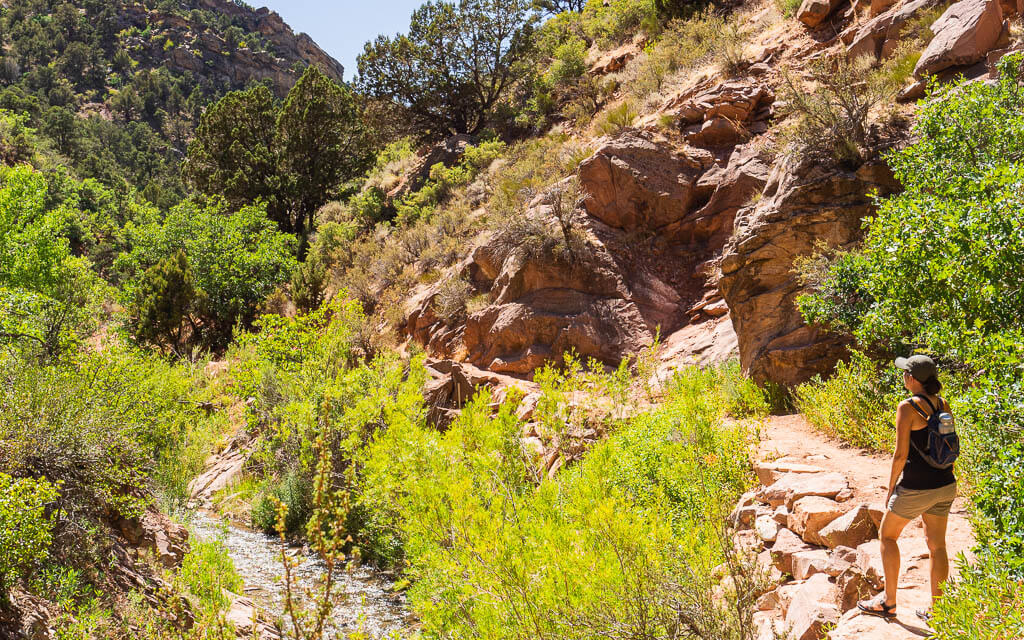
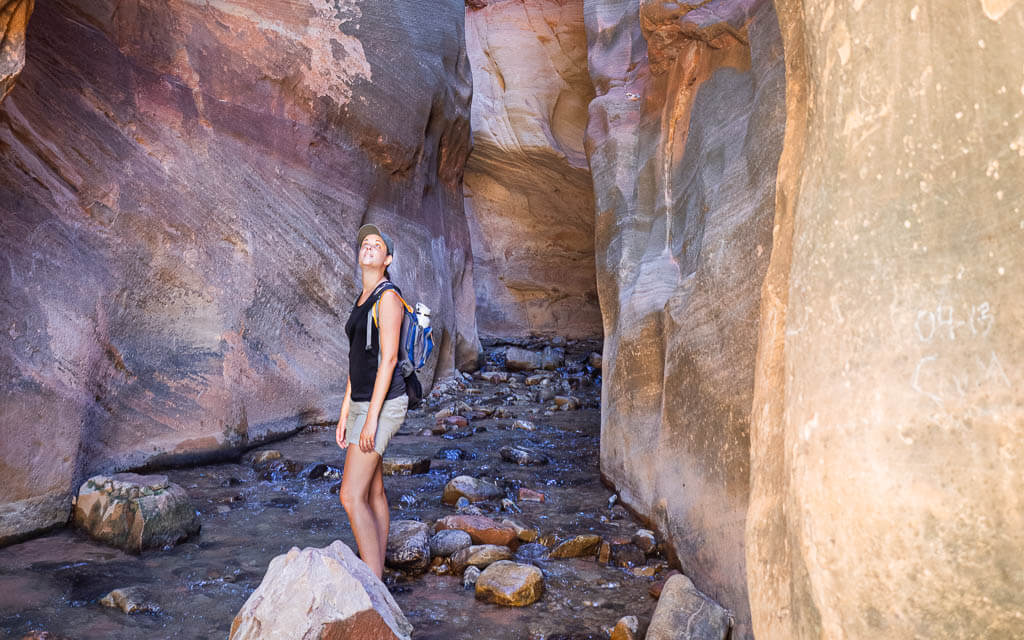
When you expect to hike through a slot canyon from now on, we have to disappoint you. You will stay on a dirt path through a forest for about another 0.8 of a mile.
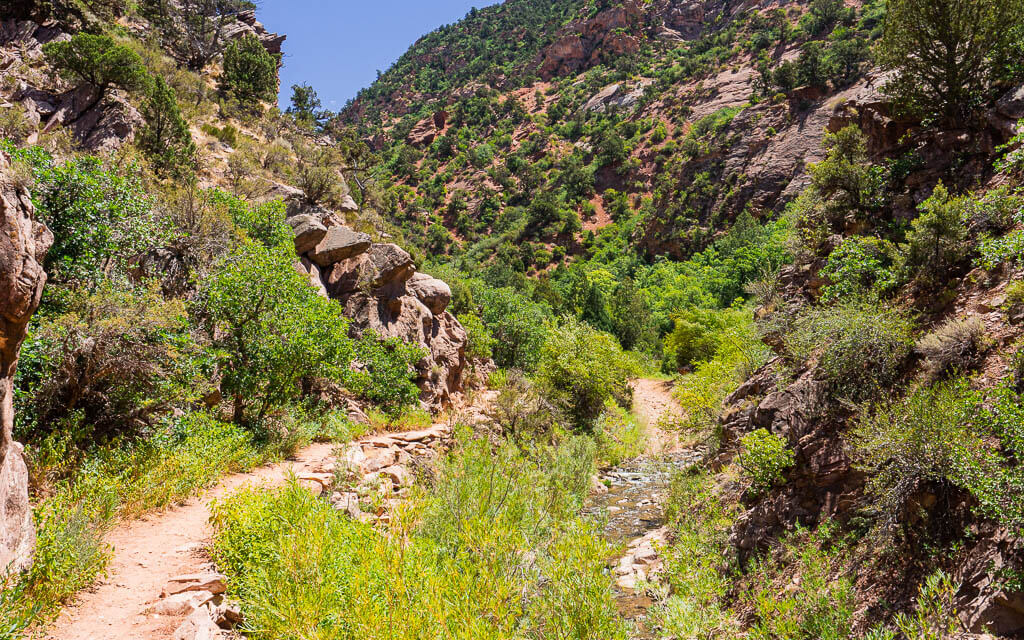
Keep your excitement and enjoy the beautiful lush vegetation around you. For the majority of the hike to the first waterfall, you will be able to hike on either side of Kanarra Creek Utah.
Exiting BLM Lands
It might be a little tricky to find the actual trail since there are a lot of used paths. Try your best to follow the Leave No Trace principles and don’t step on the precious vegetation.
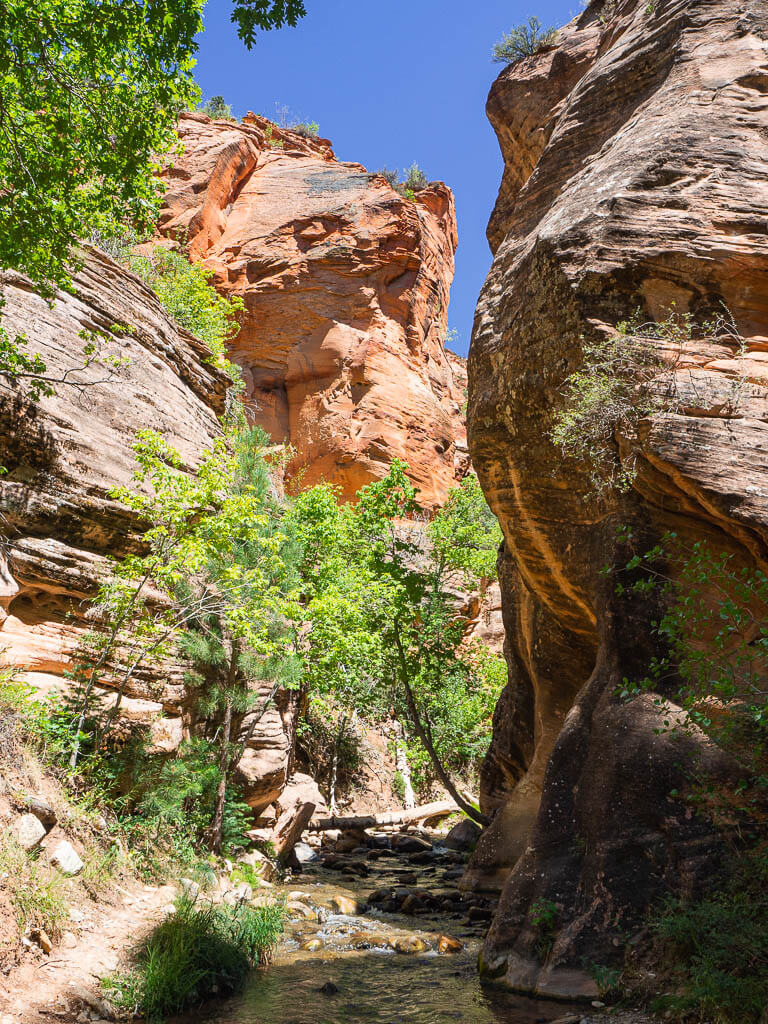
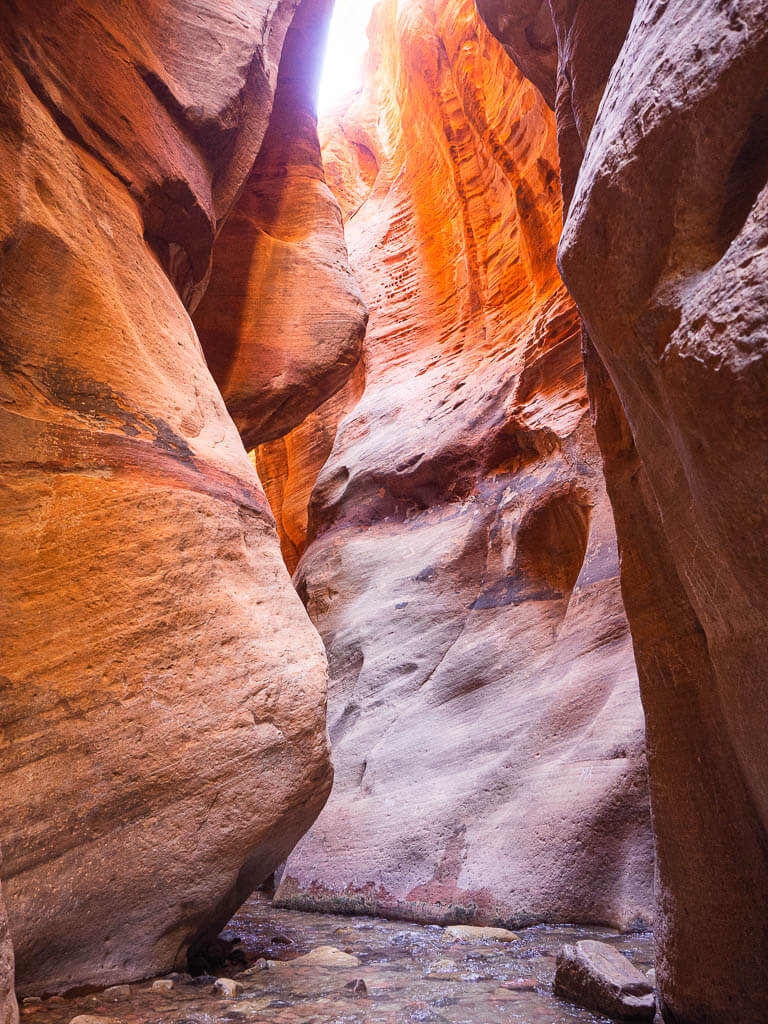
The more the Kanarra Creek trail narrows, the more beautiful the scenery gets. While getting closer to the entrance to the Kanarra Creek slot canyon, you will have to start walking through the water.
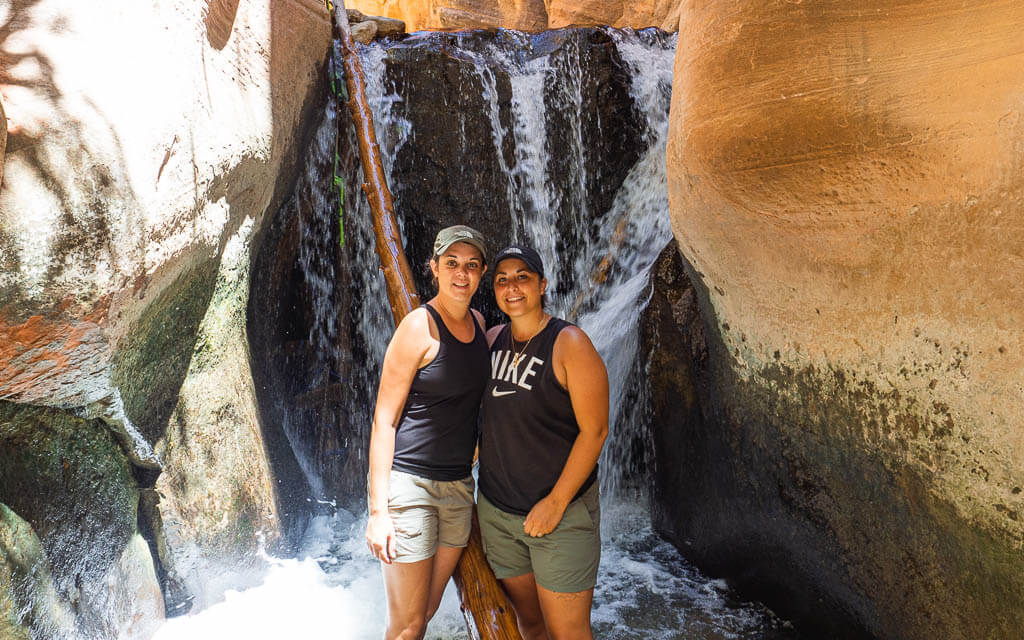
First Waterfall
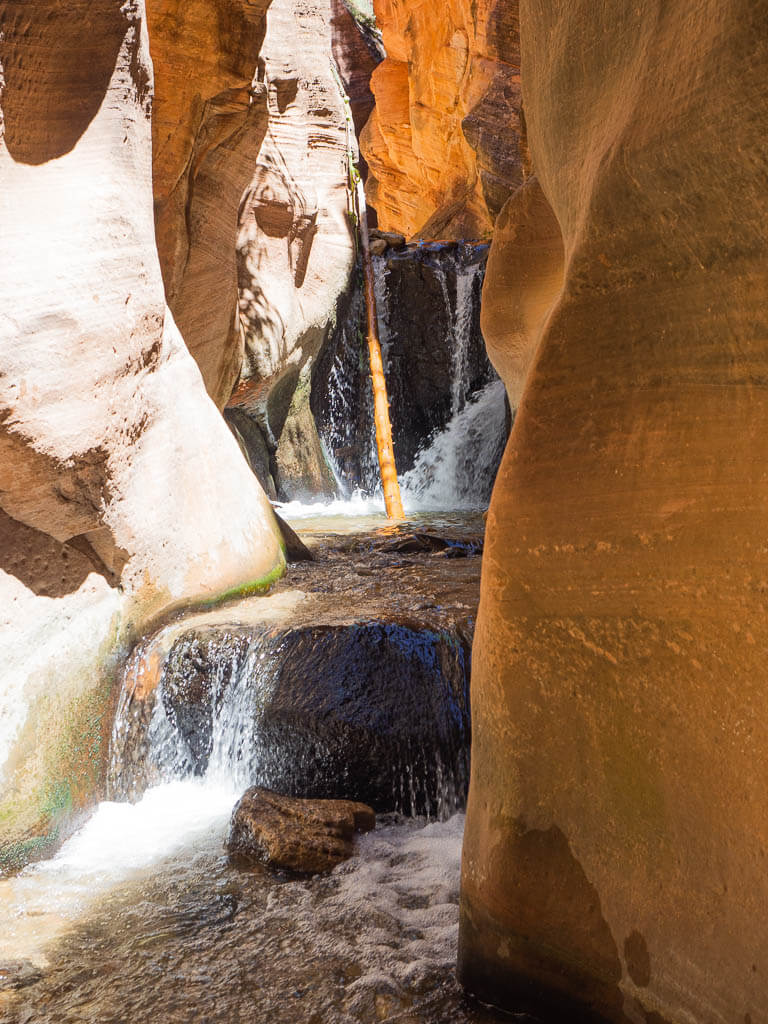
After about 1.6 miles you will reach the actual Kanarra Creek slot canyon. Enjoy wading through the mesmerizing high canyon walls and get ready to spot the first waterfall and major highlight of the Kanarra Falls hike.
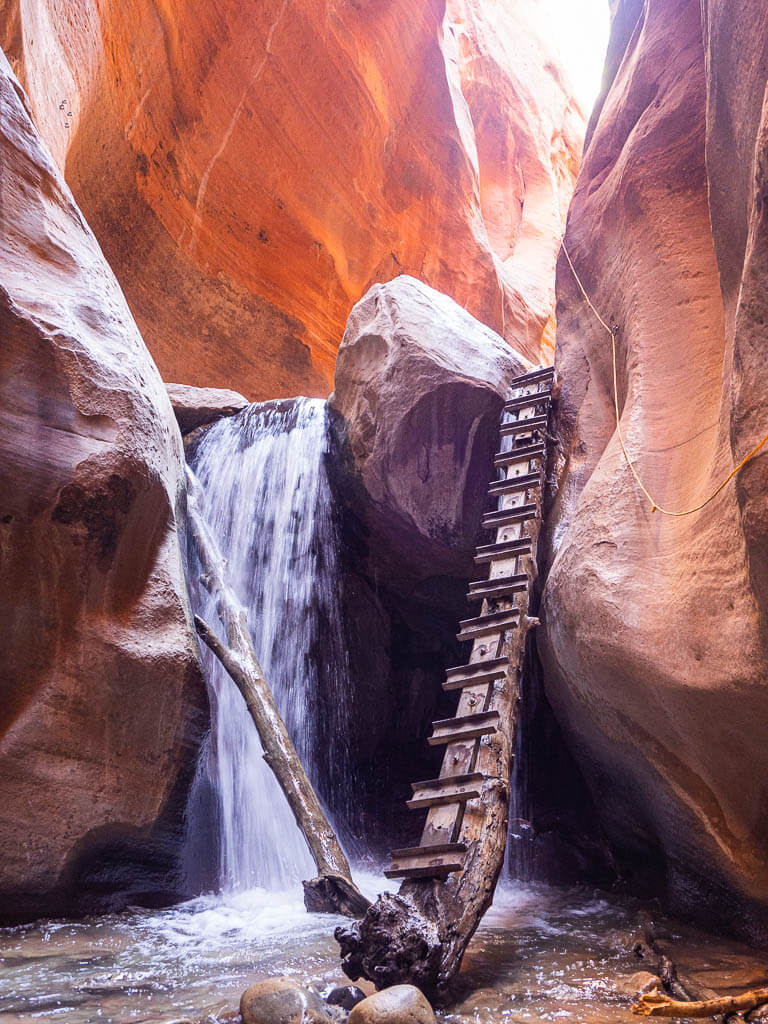
You can continue hiking the trail by climbing up the slippery, occasionally wobbly, tiny ladder that is in front of you.
Be mindful that this is not a real ladder. It is a makeshift ladder that was built to climb up past the waterfall.
There is some small rope to your right-hand side that might be helpful to make it to the top of the ladder.

The ladder looks a little scary and presents some challenges but when you take it slow, it is absolutely doable.
Plus you will definitely miss out on the rest of this epic trail when you turn around at that point.
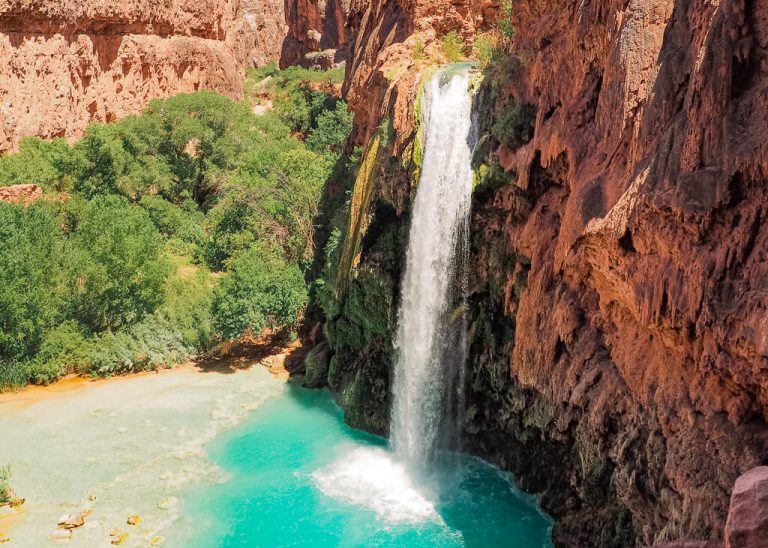
Top Tip: If you love climbing wiggly ladders, you have to challenge yourself on the Mooney Falls Trail in Havasupai, Arizona.
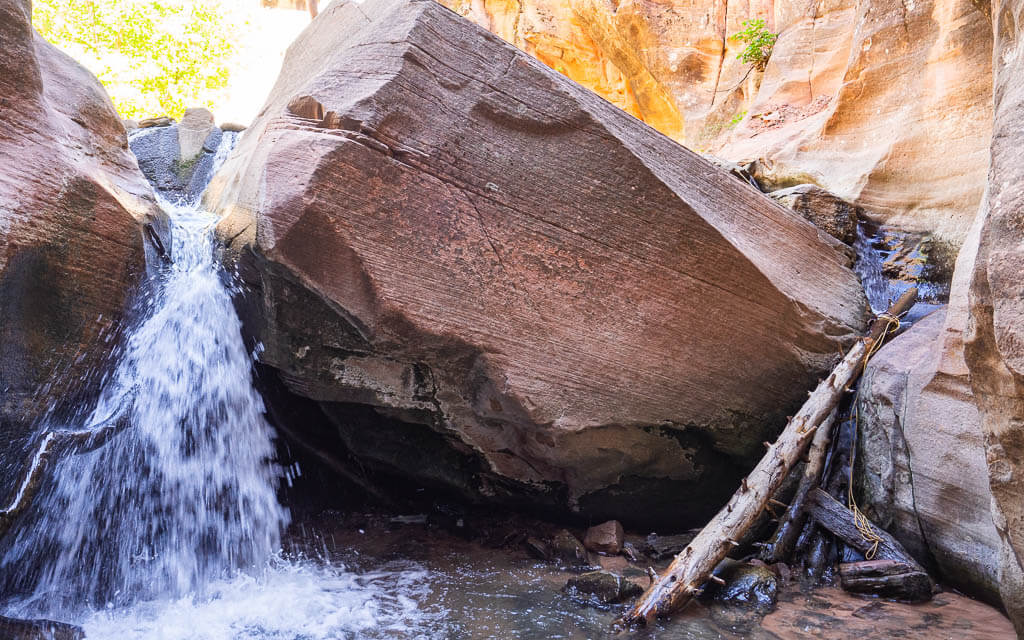
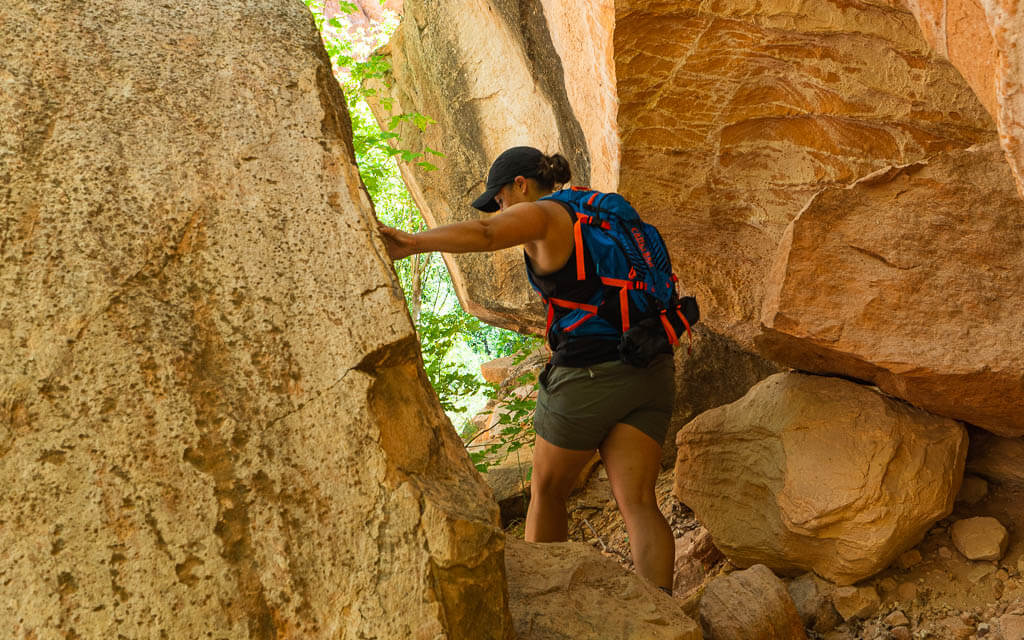
The Boulder
Shortly after the first waterfall, you will face 1 more obstacle. Now, you will have to climb up a log with a rope attached to it to bypass a massive boulder.
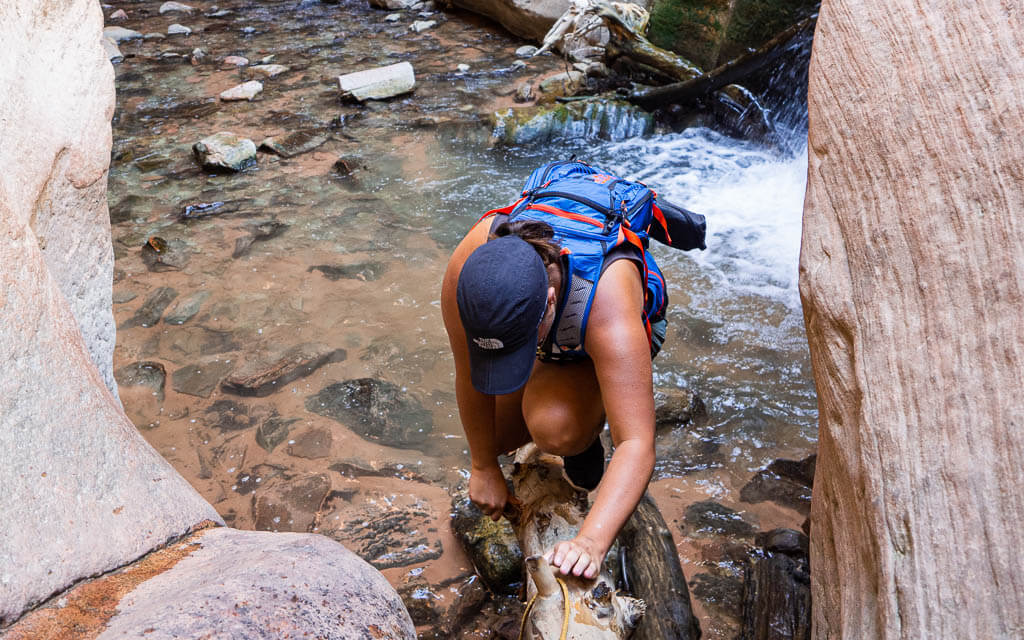
When you have successfully made it to the top, the trail opens back up and you won’t have to wade in the water anymore. Follow the trail next to the Kanarra Creek Utah.
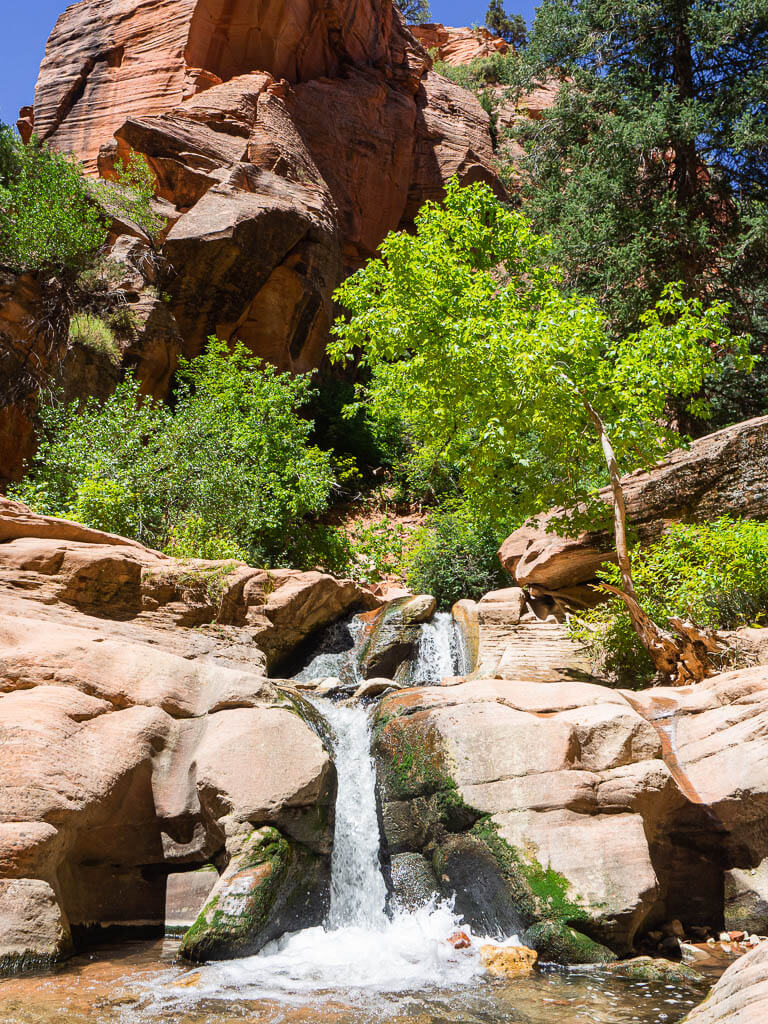
Natural Pool
After hiking about 0.2 of a mile, you will come to the second highlight along the Kanarra Creek trail, the natural water slide.
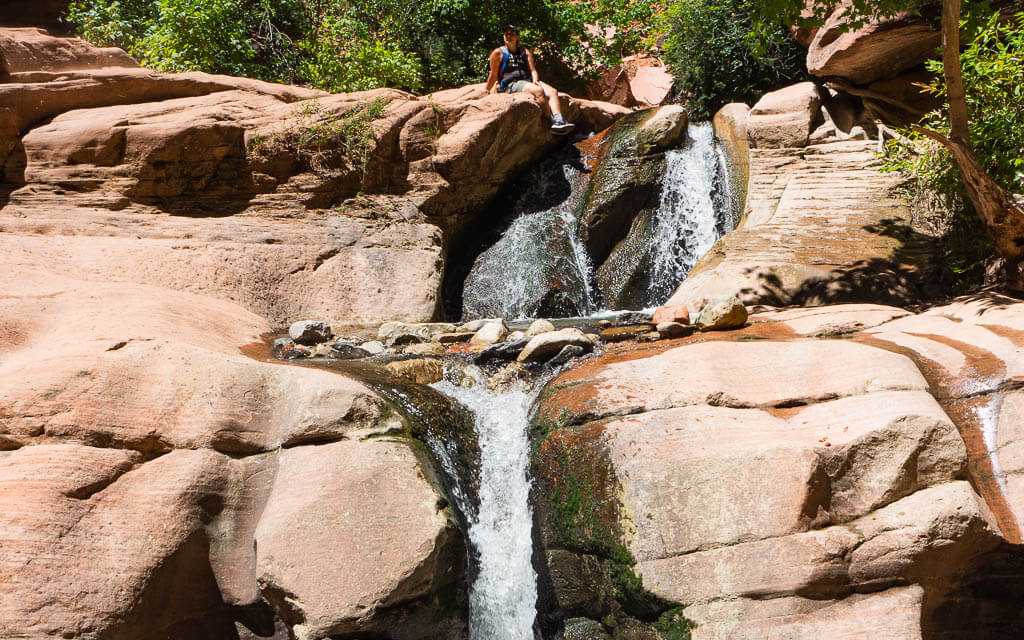
This is a trail favorite because here you have the chance to take a short slide down the rocks into a small pool of water.
There are usually a few fellow hikers hanging out in the area, so you shouldn’t have a problem finding it. Take in the amazement of this cool feature, and when you are done, continue past the slide to reach the second waterfall.
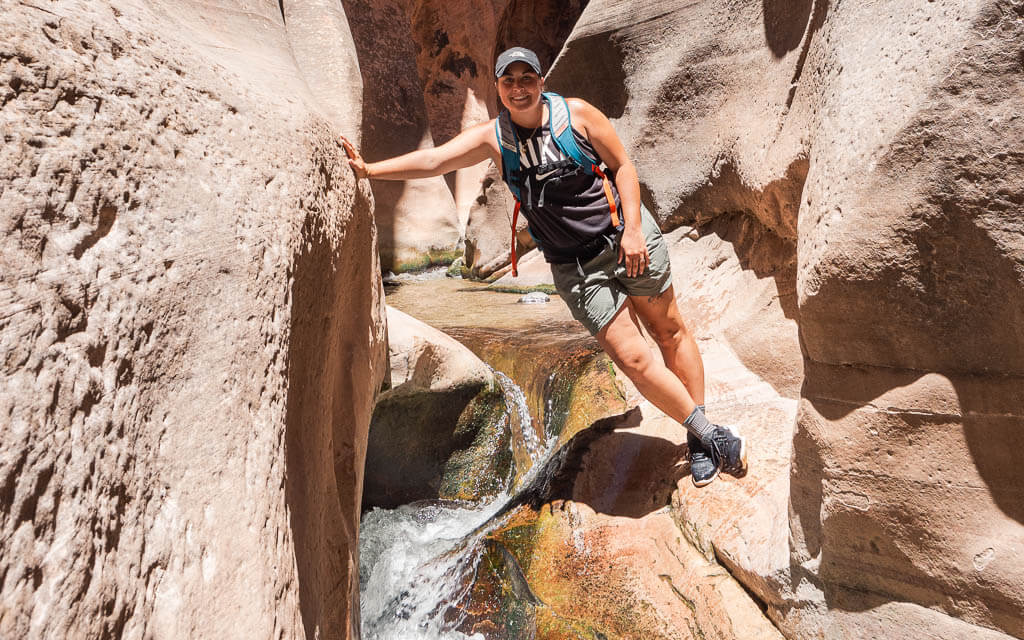
Second Waterfall
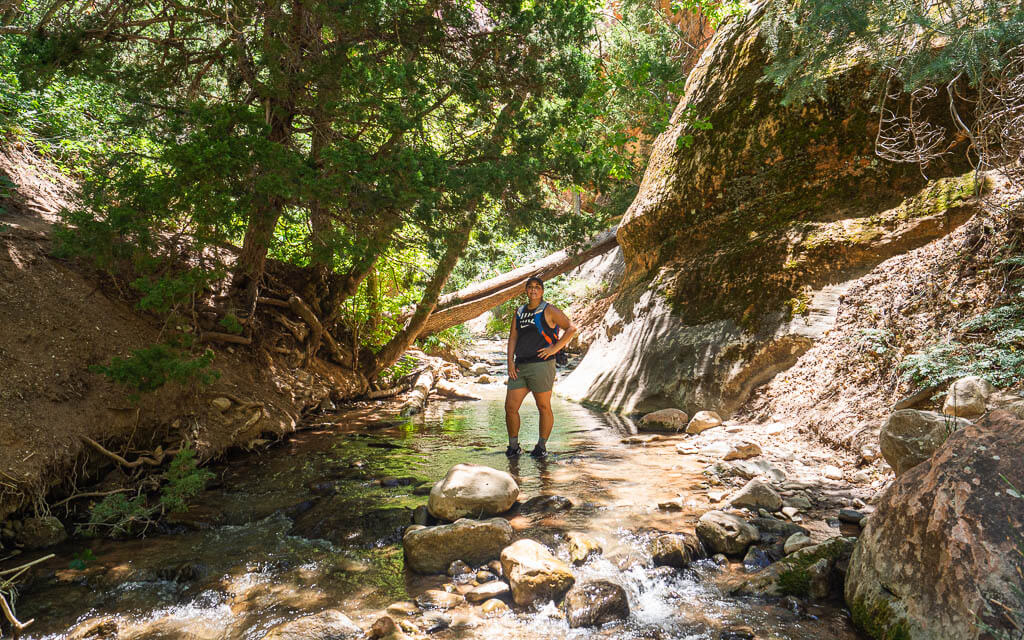
Just before you arrive at the second waterfall, the trail will begin to narrow again. In this section of the trail, the water levels are the highest. But no need to worry, you won’t be going swimming.
When we did this hike in August, the water was about shin deep. Once you have made it to the second waterfall, you have reached the end of the Kanarra Creek trail.
Although some hikers have put up ropes, trying to scale the waterfall, the Kanarra Falls hike does not continue past this waterfall.
It is dangerous to try and go beyond this point, as it is very difficult to rescue hikers that may need assistance in this area.
Snap a photo, and take in the view, before you make your way back. To reach the Kanarra Creek Falls parking lot, you will have to retrace your steps and follow the same trail back out of the Kanarra Creek slot canyon.
Suggested Hiking Gear for the Trail
Drybag – Since you will be wading through a creek, it is smart to protect your electronics from the water. The best way to do so is by using a drybag. You wouldn’t want to accidentally drop your bag in the water and ruin your expensive camera gear, phones, and keys.
Closed Toe Shoes with Grip – This trail is can be challenging because you are hiking on uneven, slippery surfaces for a good portion of the hike. Make sure to wear comfortable, and reliable hiking shoes or boots. Our personal favorites are the Tropicfeel Canyon multi-use shoe. We would not recommend hiking this trail in hiking sandals.
Hiking Poles – The use of hiking poles is recommended for the trail. Personally, we did not bring them or find that we needed to have them when we visited Kanarra Falls in late July. But depending on water levels, you may find using hiking poles to be beneficial.
Plenty of Water – Just like on any hiking trail you venture out on, make sure you are carrying enough water with you. Remember, the longer the hike and the hotter the temperature, the more water you will need. Hiking the Kanarra Creek Falls trail will take anywhere from 2 hours to 4 hours depending on how far you hike into the canyon and how fast you hike.
Best Time to Go
In general, the best time to hike Kanarraville Falls Utah is from late April to September.
But if you want to avoid the busier times, we would not suggest going during the summer months of July and August. We visited in July and had no issue securing a permit.
The trail is open 7 days a week all year long. But do keep in mind that weather conditions can have an impact on your visit. Kanarraville Falls hike can be closed without notice if there is a chance of bad weather in the area which would cause unsafe conditions.
Best Tips for Visiting Kanarra Falls
1. Check the hours of operation
Kanarra Falls hike is open from daybreak to sundown in the spring, summer, and fall. Hours of operation become more limited in the winter months.
Be aware that the trail can be closed suddenly in the event that there is potential for heavy rain or thunderstorm in the area.
2. Leave your pets at home
There are absolutely no pets allowed on the trail. Kanarra Creek is the watershed for the town of Kanarraville Utah. It is important to make sure to keep this area clean to prevent contamination. Please leave your pets at home for this hike.
3. Don’t bring small children
The Kanarra Falls hike does not require the use of any special equipment to explore the canyon, therefore it is considered a family-friendly hike.
We would still not recommend bringing small children on the hike, since it presents some challenges for the younger hikers. You will find uneven slippery surfaces, areas where you may need to climb over obstacles, and slippery unsteady makeshift ladders to ascend.
4. Use the bathroom facilities
You can find 2 restrooms on the trail. There are porta-potties at the trailhead, and one vault toilet right before you reach the Kanarra Falls sign (0.8 miles).
These should be the only facilities you use while visiting Kanarraville Falls. Anything you bring on the hike should be packed out with you. Don’t be the fool who leaves trash behind.
5. Don’t rely on the cell service
Be aware, that you won’t always have cell service when hiking the Kanarra Creek Falls trail. Occasionally you may find a signal along the way but do not rely on your phone for directions or anything else. We love to use these opportunities to disconnect from the world and enjoy the landscape around us.
6. Hike at your own risk
Along the way, the trail does present different challenges which change with the seasons. When hiking the Kanarra Creek Falls trail, use your best judgment and make your decision on how far you want to hike based on your abilities, strengths, and comfort.
In July, the water in the creek was kind of cold, so we can only imagine how it must feel to hike this trail in the colder months. Wear proper shoes and maybe even neoprene socks.
7. Be aware of potential flash floods
In slot canyons flash floods can happen quickly when weather conditions change.
In this area of Utah, it is most common for a flash flood to happen in the months of July, August, and September. But that does not mean you are out of the water during the rest of the year. Flash floods can occur anytime throughout the year and could put you at a risk.
Top Tip: Before heading out on your hike it is always a good idea to check the weather forecast for the local area. It also helps to know the signs of potential flash floods.
8. Leave no trace
Please recreate responsibly. Anytime you are exploring and enjoying the outdoors, it is important to remember to follow the Leave No Trace principles. Respect and appreciate nature, so that future generations can enjoy the same beauty. If you aren’t familiar with the Leave No Trace Principles, here they are:
- Plan Ahead & Prepare
- Travel on Durable Surfaces
- Properly Dispose of Waste
- Leave What You Find
- Minimize Campfire Impacts
- Respect Wildlife
- Be Considerate of Others
Final Thoughts on Hiking Kanarra Falls Utah
Kanarra Falls is a quick and fun hike that should definitely be on your to-do list. It is in close proximity to Utah’s fantastic National Parks, and definitely worth a quick (or even long) detour.
We expected the hike to be mainly in the slot canyon and were a little disappointed when we realized that the main part of the trail follows a dirt path along the river. Just the last mile will actually lead you through the narrow-tall canyon walls which make this trail so remarkable.
Nevertheless, we had an adventurous day, challenged ourselves once again, and enjoyed the beautiful nature in Utah. Now, we are looking forward to finding our next slot canyon hike!
Were you brave enough to climb the Kanarra Falls ladder? What was your biggest challenge on the trail?
Share your experiences with us or drop a question in the comments below!
Our Other Resources for Utah:
- Arches: 8 Incredible Trails to Hike Arches National Park
- Bryce Canyon: Best Bryce Canyon Hikes for Your Bucket List
- Capitol Reef: Explore 10 Striking Capitol Reef Hikes in the Fruita District
- Canyonlands: The Best of Island in the Sky Canyonlands National Park
- Zion: 11 Best Hikes in Zion National Park
- Zion: A Guide to Hike The Narrows in Zion National Park
- Road Trip: Explore Utahs National Parks in One Unforgettable Road Trip
You May Also Like:
- Hiking: 15 Most Helpful Hiking Apps to Download
- Hiking: What You Should be Packing for a Hike: The Essentials + Extras
- Hiking: 100+ Best Gifts for Hikers to Buy
- Quotes: 90+ Best Quotes about Falls to Inspire Your Wanderlust
- National Parks: 34 Best West Coast National Parks + Western U.S. Parks that Will Blow Your Mind
Save this Post for later on Pinterest!
Did you like this post? Subscribe to our newsletter and we’ll send you more unique travel tips, updates, and even FREE content!